Here are some resources and ideas to keep you creative while classes are not in session.
Mapping Your World
June 9, 2020
How has your world changed in the time of COVID-19? Where have you been spending the last 3 months? How has your routine, and the places you visit, changed under distancing and isolation?
CityLab and The Tyee asked their readers to map their new worlds. Here are some examples:

We are on the edge of a beautiful regional wilderness and animals come down out of the hills all the time. We share our space with bobcats, deer, raccoons, coyotes, wild turkeys and Canada geese, among others. We are taking four- to five-mile walks that we never did before, and are really seeing the wild hills around us for the first time. The red lines on the map indicate some of the very steep uphills that we encounter on our daily walks.
– Alexandra Connor, Walnut Creek, California

I’ve been mostly confined to my home. I have no dog, and I live alone. My walks to the supermarket have been every 10 days, more or less. Before the government loosened the rules, my home had become my neighborhood and world in general.
– Blanca Juan García, Madrid, Spain

I made drawings of the places I frequently visit around my house. Connecting the images is a red string, which represents the use of my phone. The idea came to me after I constantly found myself scrolling on TikTok or Instagram, and being on my phone in general.
– Clare Halvorsen, Philadelphia, Pennsylvania

We have three adults working from home (and one more as an essential worker), two of whom are also studying part-time. Our entire neighborhood (or should I say world) has been shrunk down into just our home, and on the periphery are the nearest supermarket and our preferred walking routes around our home. Rather than waving and greeting each other as we leave and return home, we just wave to each other through the windows, if we happen to see each other.
– Joanna Chow, Auckland, New Zealand
Today’s assignment:
- Plan your map: Where have you been spending your time over the last 3 months? What places have become important to you? What are some of the images you see?
- Decide what materials you will use to create your map (Paint? Pencil? Collage? etc.)
- Create your map.
- Write a short description of your map.
- Send me photos and the description of your map on Teams or Instagram.
– – – – – – – – – – –
Gridding To Create Realism
June 3, 2020
Sometimes, using a reference that is full of detail can be overwhelming for developing artists! Using a gridding technique to help create accurate detail, or to accurately change the size of your reference, can be helpful.
Drawing or painting from a photograph reference can be a very challenging experience! You can use a free gridding app on your phone to break a very complex photograph into smaller, more manageable pieces. Check out this tutorial video:
Today’s assignment:
- Take a new photo, or use an old photo from your phone.
- Make a copy of the photo, and change the colour setting to black and white.
- Use a gridding tool on your phone (it may already be a tool on your phone, or you can download a free app) to lay over top of your photo. Decide how many squares you want.
- On a piece of paper, use a ruler and LIGHTLY create the exact same number of squares. The squares can be larger or the same size as you see on your phone.
- Draw what you see in the squares from your phone onto paper, to the best of your ability. Use shading to create accuracy, depth and interest.
- Send me photos of your gridded drawing, as well as the original photo, on Teams or Instagram.
– – – – – – – – – – –
Mandalas
May 26, 2020
This is a very meditative art activity that we hope will help you create some moments of zen.
First, some context: Mandalas have a long history in Buddhist culture. The earliest evidence of Buddhist mandala art dates back over 2,000 years!
Buddhist monks create sand mandalas using specific symbols that tell stories. Each mandala has its own meaning. Check out this 2 minute video to see a beautiful sand mandala painstakingly created over 6 days, that is then swept away:
Other artists have borrowed these ideas and create beautiful mandalas with pen and paper.
Here are two videos showing step-by-step how to make a mandala.
The first video shows three beginner mandalas and gives helpful tips.
The second video is a step-by-step guide to creating a more complex mandala. This video includes a lot of basic shapes you can use. Start watching at 2:22. (If you want to use a compass and ruler to set up your mandala, check out the beginning of the video too.)
Today’s assignment:
- Find a piece of paper and a tool you can use to draw small detail (e.g. ballpoint pen, pencil, pencil crayon, fineliner, etc.).
- Start in the centre and work your way out. Use the videos to help guide you.
- Use any symbols you like. You can use the ones in the videos or make up your own.
- You can leave it as black and white or add colour.
- Send me photos of your Mandala on Teams or Instagram.
– – – – – – – – – – –
Self-Directed Study
May 21, 2020
As we head towards the end of the semester, I hope you will finish up any of the previous art activities that interest you.
Today’s art activity is a self-directed art study where we encourage you to be creative and resourceful. You get the chance to make art of your choice with materials and tools you have available to you at home. We know for some of you this is what you have already tried a few times, but for others it may be new.
Here are some questions to help you plan your project before you begin:
- What materials do you have access to, and what media do you want to work with?
(Drawing? Painting? Collage? Mixed Media? Sculpture? Etc.) - What style(s) are you inspired by?
(Impressionism? Abstract? Realism? Surrealism? Pop Art? Etc.) - What subject(s) interests you?
(Landscapes? Animals? People? Abstract? Etc.) - What references do you need? Is there an online tutorial that might help?
The opportunities are limitless!
When you hand in your self-directed artwork, we’d like to you to tell us what materials you used, how long you spent on your piece, what your process was, if you used references/tutorials (you can include links), and answer the 4 assessment reflection questions:
- What went well?
- What was challenging, and what would you change if you had a magic wand or a time machine?
- What was something new that you tried, and what did you learn?
- What is something you would like to try, or practice more, in the future?
I’ve posted all of this on Teams (including a Word doc where you can answer the reflection questions), but as always you are welcome to send me your work on Instagram too.
– – – – – – – – – – –
Draw On My Back Challenge
May 19, 2020
The “Draw On My Back” challenge is a great way to have fun and be creative with another person!
Basically, the challenge involves one person putting a piece of paper on the wall, and a second person putting a piece of paper on the first person’s back. Then, the second person creates a simple doodle, one step at a time, while the first person attempts to draw what they are feeling on their back.
You can even try it with a third person which makes it even more fun and funny!
Today’s assignment:
- Get 2 pieces of paper, 2 drawing tools, and a family member who’s willing to be part of your drawing challenge.
- You start by drawing on their back. Have them try and re-draw what you are drawing. Remember to keep it simple and draw only a little at a time so your partner can keep up.
- Then switch roles – you re-draw what they draw on your back. You will end up with 4 drawings after you switch roles.
- Send me photos of your artwork on Teams or Instagram, or even videos of you doing the challenge!
– – – – – – – – – – –
Art with Tiny Things
May 14, 2020
A lot of people are struggling to find creative inspiration right now. This activity is simple but will push your brain to think creatively, and hopefully will help you have a little fun with art!
Inspired by artist and neuroscientist Desirée De León’s project 100 Days of Tiny Things:


Today’s assignment:
- Collect 5 tiny things from around your house or outside
- Make 5 tiny drawings incorporating each of those tiny things
- Send me photos of your artwork on Teams or Instagram.
– – – – – – – – – – –
Painting with Coffee & Tea
May 12, 2020
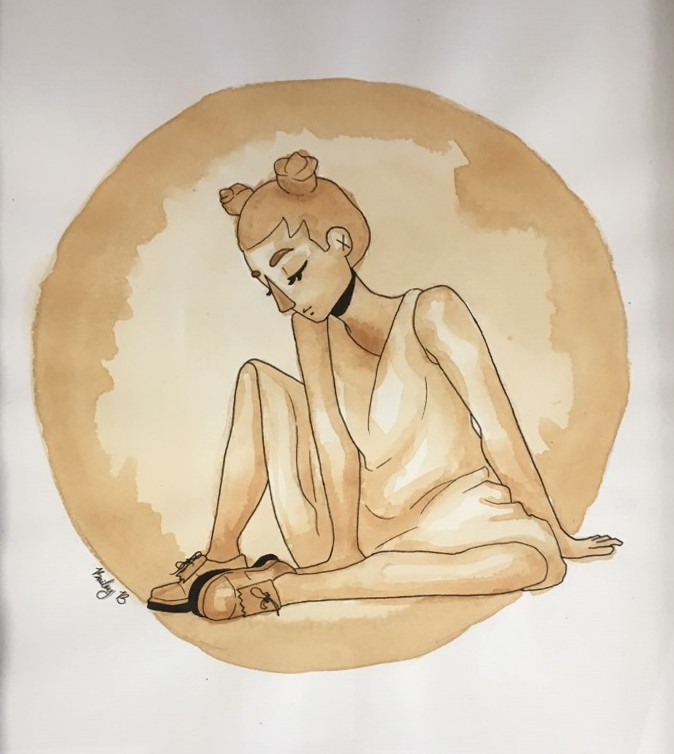
Did you know that coffee, tea, and even hot chocolate can serve as an inexpensive “paint” that yields dramatic artwork? It behaves similar to watercolour paint with rich tints and shades of browns.
You do not need paint brushes to create your masterpiece! You can use toothpicks, thread, string, straws, Q tips, fingers, or even a spoon:
Before you begin, experiment: Use any kind of paper and create coffee, tea or hot chocolate “swatches”:
- How light and how dark can you make it?
- What happens when you add more or less water?
- How does the colour/shade change when it dries?


Then, make a plan, and make your art!
- Are you going to create abstract or representational art?
- Do you want to use any references?
- Will it help to lightly sketch it out in advance?
Tips:
- Start light and layer the darker tones over top after; just like painting with watercolour!
- Use a hair dryer to speed up the drying time between layers.
- After it is dry you can use pencil, pen, pencil crayons, or a sharpie to outline if you want to create more definition in your shapes.
Inspiration
Our very own Bailey B made this tea & ink painting for the art show at the Island Grind last year, titled “Spilled Tea”:
More inspiration, from the internets:


Check out this coffee speed-painting in action:
You can get a few more colours out of some kinds of tea:
Hot chocolate works too!
Don’t forget to send me photos of your coffee/tea/hot chocolate painting on Teams or Instagram!
– – – – – – – – – – –
Here’s a gift for you! We hope you enjoy it!!
– – – – – – – – – – –
Land Art
May 7, 2020
As the weather warms up, we thought we’d send you outdoors to do some Land Art.
Land Art is made in nature. Artists sculpt the land itself, or use natural materials such as rocks or twigs to create works of art.
Andy Goldsworthy is a British sculptor, photographer, environmentalist and Land Artist. He uses leaves, sticks, rocks, ice, and other natural materials to create artwork that explores our connection with nature.


Land Art is temporary. Artists rely on nature to create their art, and know it will also be destroyed by nature. E.g. the sun melting an ice sculpture, tides pulling a pattern of sand and rocks into the ocean, the wind blowing away delicately-placed leaves and sticks.
Check out this 3 minute video of Andy Goldsworthy working on some stunning and very fragile projects.
Today’s Assignment: Make some Land Art!
There are two big questions you need to answer before you start:
- What materials do you have access to?
- Look for interesting shapes, colours, patterns and textures to inspire your work.
- Where are you going to construct your art?
- Choose your location carefully, as it’s not simple to pick up and move.
- Find a place that’s sheltered from wind and water, and away from human and animal traffic.
Please take photos as you create your art, because you can’t always control or predict nature!
Send photos of your Land Art on Teams or Instagram.
– – – – – – – – – – –
Collage
May 5, 2020
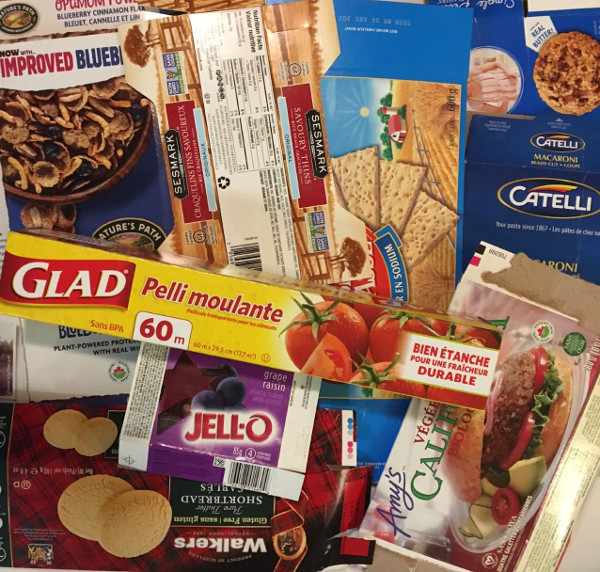
Wondering what to do with all that recycling piling up? Make a collage!
You can make collages out of many kinds of scraps you can find around your house: newspaper, magazines, junk mail, food packaging, fabric, paint chips, etc.
Collage has a long and weird history in the art world, from Picasso and Cubism, to Dada, Surrealism, Pop Art and right up through today. Check out loads of cool examples here.
Below are some examples of representational collage — these two contemporary artists assemble shapes and colours to look like recognizable things.
Ekua Holmes‘ rich storytelling collages are made from scraps of vintage wallpapers, snippets of yesterday’s news and pieces of discarded costume jewelry, laid upon fields of primary colours and multiple textures. More on her website.


Sunshine Coast artist Carol Lafave’s collage cityscapes are so vibrant and have so much energy and movement. More on her website.


Artists also make abstract collages, focusing on interesting shapes, colours, patterns and designs.
")
")


")
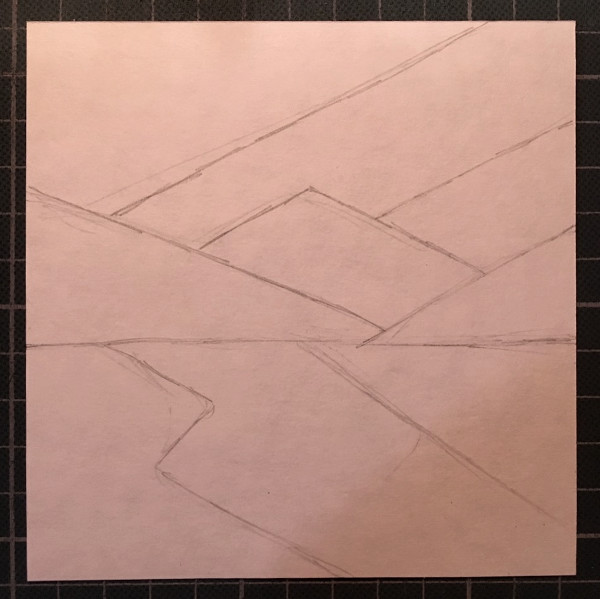
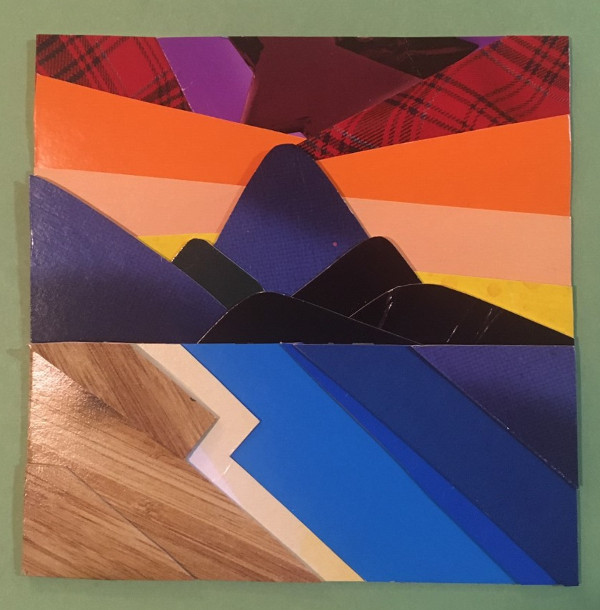
Our sample for this collage activity is inspired by abstract landscape paintings by American artist Rachael Cassiani.


Step 1: Collect your materials
Step 2: Sketch out a rough idea. This is on a 5″ x 5″ piece of scrap paper.
Step 3: Start assembling. You can use glue, tape, or anything sticky that you have around. Maybe even gum? Or make your own glue!
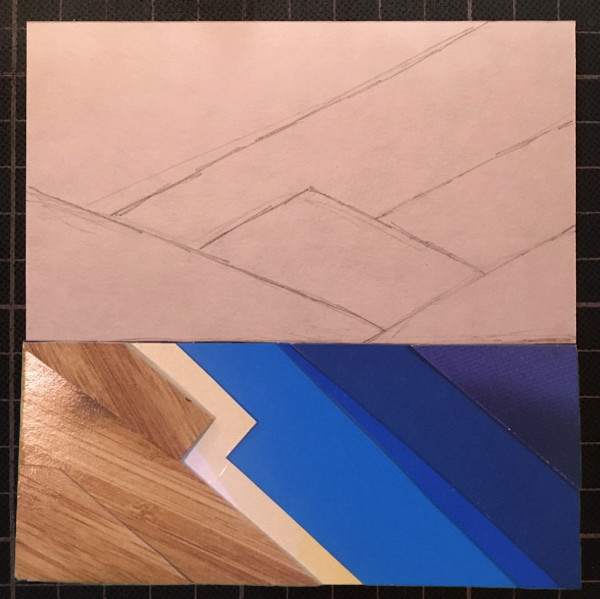
If you are a brave risk-taker, you could skip the sticky stuff all together. Arrange your collage on the floor, counter, or table, and take a picture of it before the wind blows or the dog walks on it!
Step 4: Make changes to your original sketch as needed. Improvise on the fly!
Today’s assignment:
- Decide on a theme and style for your collage
- Lightly sketch out your idea, then simplify it
- Gather all the materials you will need. Be resourceful and improvise!
- Cut or tear your pieces, and stick until finished
- Send me photos of your collage on Teams or Instagram.
– – – – – – – – – – –
Cartooning, Part 2: Character & Idea Development
April 30, 2020
Now that you’ve practiced facial expressions in Part 1, it’s time to develop your character and plan your cartoon!
- What do you like to draw? This can become your cartoon character! It could be a simple cactus, mushroom, shark, etc. Anything works, just add a face with an expression. Lightly sketch out some ideas until you find one that sticks.
- Brainstorm some ideas: What are different things your cartoon character may do, say, or think, that you think could be funny?
Get inspired by Lynda Barry, cartoon genius:
Here are some of my current faves:
Hyperbole and a Half, by Allie Brosh
Her artwork is fairly simple, but she conveys SO much through the characters and their expressions and actions.

2cake.png)
Chelsea Lea
Chelsea is an Ottawa-based illustrator and designer, and if you scroll through her Instagram feed you’ll see a lot of adorable, expressive, stylized characters, in funny one-frame situations. Again, she conveys a lot with a simple character, great expressions, and sometimes a few words.

Today’s assignment:
- Lightly sketch out your character, and think of a funny situation or story to put them in. You can use one frame or more.
- Use some of the expressions you practiced in Part 1 to help convey a message and feeling.
- Refine your drawing(s), and add colour if you want.
- Send me photos of your cartoon on Teams or Instagram.
– – – – – – – – – – –
Cartooning, Part 1: Expressions
April 28, 2020
In cartooning, facial expressions are exaggerated and distorted to convey a message with just a few lines and shapes.
Jim Borgman’s “How Are You Feeling Today?” poster is a great example of a range of expressions:

There are many awesome “how to” YouTube videos for all sorts of cartooning. Our Aussie pal Jazza has a step-by-step tutorial on drawing dynamic expressions:
Today’s assignment:
- Do your research: how do other cartoon artists create expressions? What do they exaggerate? What do they distort? You can even use a mirror for inspiration!
- Make a series of quick thumbnail sketches showing at least 10 different expressions. The more practice, the better!
- Don’t worry about the type of cartoon character you’re making (stay tuned for Part 2 of this assignment on Thursday!). Just focus on exaggerated and distorted expressions using light, sketchy facial features.
- Send me photos of your sketched expressions on Teams or Instagram.
– – – – – – – – – – –
Mobiles
April 23, 2020
Alexander Calder was a sculpture artist who invented the mobile in 1931. His mobiles were often very large, had many pieces attached in complex arrangements, with simple shapes. They were light and moved with the slightest breeze or touch.
Mobiles can be made from just about anything! What objects do you have at home? What could you find outside?
Your mobile could have a theme, e.g.
- Nature – e.g. bark, leaves, sticks, etc.
- Beach – e.g. driftwood, shells, beach glass, etc.
- Toys – e.g. lego, finger puppets, figurines, etc.
- Origami
- Colours or shapes cut out of paper
- Collections of things – e.g. buttons, beads, etc.
To hang the objects, you can use thread, string, yarn, fishing line, ribbon, wire, dental floss, etc.
Tip: to hang items like beach glass or shells, wrap some wire around them to create a hook. Be resourceful – twist-ties can be unwrapped, and paperclips can be unfolded and used like wire.
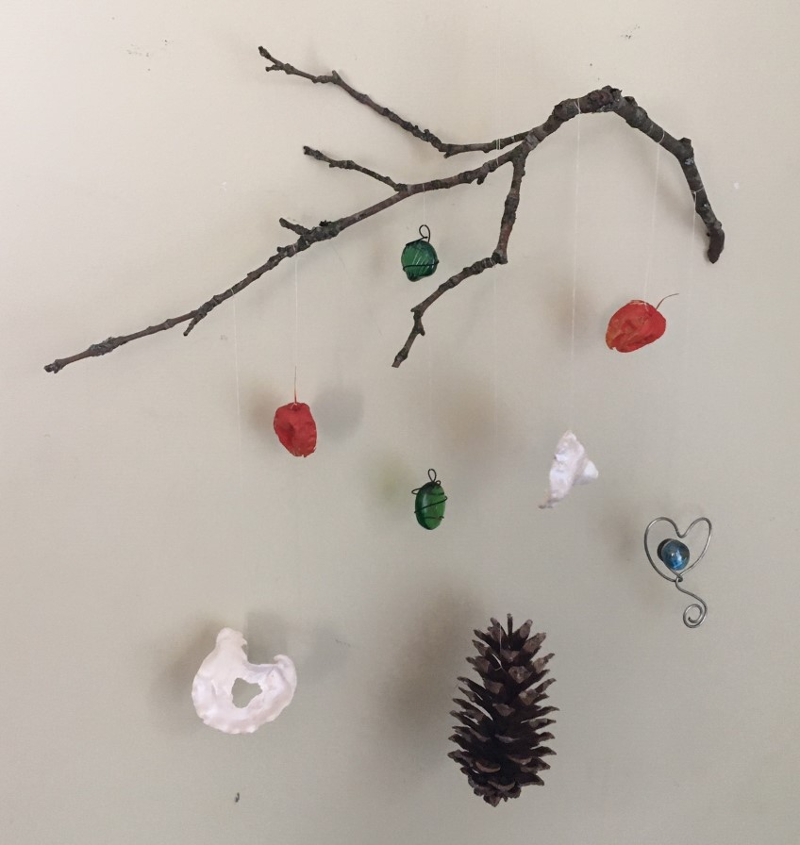
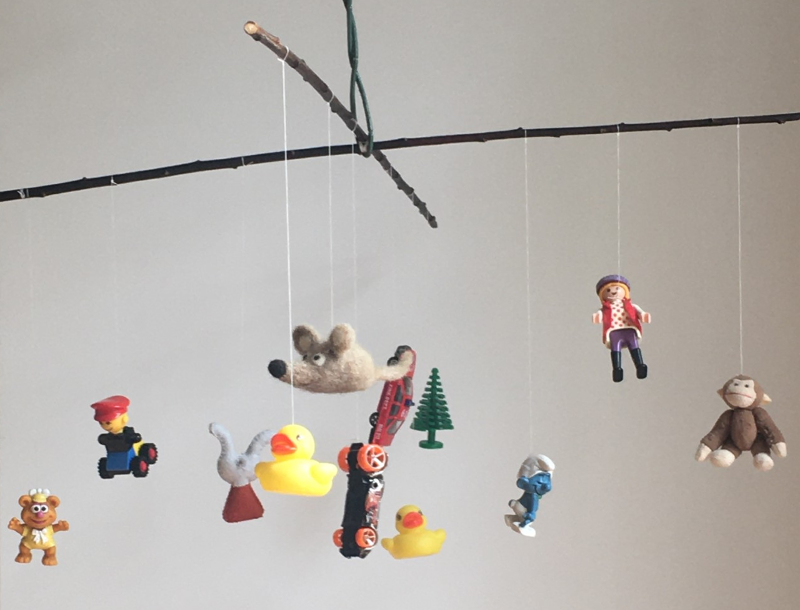
Here are two mobiles we made with items collected in the yard, and toys around the house. The third mobile was made by Aliyah, using origami paper cranes.
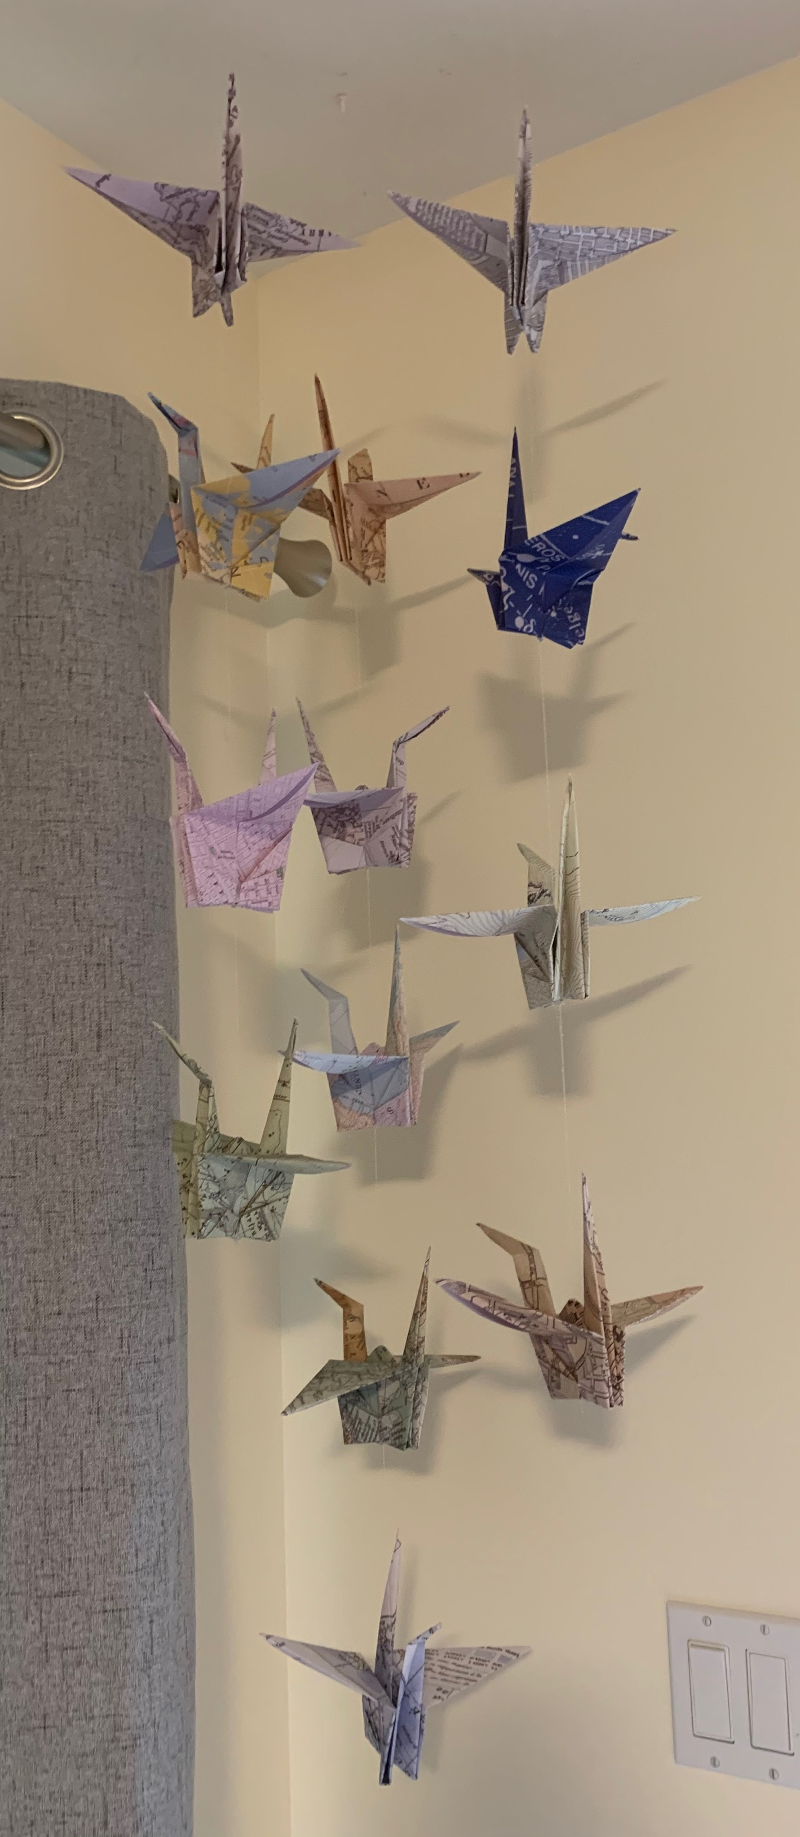
If you want to learn how to make paper cranes, this video tutorial is very easy to follow. He uses regular printer paper, but you could also use lined paper, old assignments, or magazines.
Here’s a sample of mobiles (from the internets) using found objects, natural objects, paper, string, wire, and other basic materials, to help inspire you:


The options are endless!
Today’s assignment:
- Decide on a theme for your mobile
- Find or create all the items you need
- Decide what your items will hang from (e.g. sticks and fishing line)
- Hang items at different heights, and adjust as you go to balance the weight on all sides
- Send me photos of your mobile on Teams or Instagram.
– – – – – – – – – – –
Shadow Art
April 21, 2020
This one takes no art supplies! Just you, a light source, an object, a camera, and a whole lotta creativity.
Turn shadows from everyday objects into art!
Use a simple household object to cast a shadow on paper, then draw in a little extra to complete your shadow art piece. Check out the work of shadow artist Vincent Bal:


If you’re looking to challenge yourself with something more complex, be inspired by shadow artists Kumi Yamashita and Rashad Alakbarov:


Today’s assignment:
- Play with objects and light to create shadows that look like something else
- You can draw in the rest of it, or use multiple objects to create a complete piece of art, like the examples above
- Be clever, have fun with it!
- Send me photos of your art on Teams or Instagram.
Get inspired by shadow play dance group, El Gamma Penumbra… maybe your family can create a shadow art scene with their bodies?
– – – – – – – – – – –
Window Silhouettes
April 17, 2020
This one is fun for the whole family!
Inspired by the Spanish artist Pejac, and his project Stay Art Home.
You have to get the photo just right! This is forced perspective. Play with the angles, try it closer and farther away, until you make it work.
Today’s assignment:
- Look out your window. What could you add to the view?
- Draw it, fill it with marker, and cut it out. Stick it to your window.
- Take a photo of your brilliance. Make sure you get it just right!
- Send me a picture of your art on Teams or Instagram.
– – – – – – – – – – –
Art With Nature
April 14, 2020
Art can be made on any surface. There are lots of fantastic art supplies in your yard and at the beach.
Over the last few weeks, students have been sending in photos of awesome painted rocks they’ve created.


Wood makes a great surface for your artwork too.


Don’t have paint? No problem! Permanent markers (e.g. sharpies) work really well.
Check out these funky painted and drawn-on rocks and sticks (found online).


If you have some craft supplies and a glue gun, why not make yourself a pet rock?

Today’s assignment:
- Find something in nature to make art on. Rocks, driftwood, sticks, shells… what else can you find?
- Create art with whatever supplies you have at home. Improvise! Be creative!
- Send me a picture of your art on Teams or Instagram.
TIPS
- Wash your rocks etc. before using them. Critters may have pooped on them!
- If you have liquid white-out or spare house paint, you could do a base coat, then draw on top.
- To make your rock shiny, add a coat of clear nail polish, clear varnish, or modge podge once everything is dry. Test it first!
– – – – – – – – – – –
Online Tutorials
April 10, 2020
There are so many great learning resources out there on the internets! I challenge you to find an interesting online tutorial that you follow along, step by step, to re-create whatever it is that the artist is creating. The opportunities are limitless!
You get to pick the following:
- What media do you want to work with? (Drawing? Painting? Collage? Pen? Mixed Media? Etc.) This may depend on what you have around your house.
- What subject interests you? (Landscapes? Animals? People? Abstract? Etc.)
- What style? (Abstract? Impressionism? Realism? Surrealism? Etc.)
Here are a few quick videos you may want to try:
Perspective drawing with pencil (or pen):
Tree painting technique (with acrylic, but could probably work with tempera, fingerpaint, or watercolour dry brush):
And for something completely different:
Today’s assignment:
- Find a tutorial online that you’re interested in
- Follow the tutorial! Make any accommodations you need, based on the supplies you have.
- Send me a picture of your artwork, with the link to your tutorial, on Teams or Instagram.
Keep an eye on the internets for FREE live art classes! Lots of artists are offering opportunities online, encouraging us to be creative while staying home. Participating in a live online class allows you to ask questions, and have a shared painting experience with others, all from the safety and comfort of home. In your pyjamas.
Zealous Art from Langley, BC is hosting regular family paint nights on Facebook. Invite another family member to join you!
– – – – – – – – – – –
Modern Re-Creations
April 5, 2020
Have you seen the recent memes where people have re-created famous pieces of art using objects at home? The challenge came from The Getty, a famous art museum in LA, and people have been very creative with it.
We challenge you, our art students, to give it a try! You can find famous works of art in the Getty’s online collection, or many other websites. Involve others in your family, and have fun with it!
Send us the following:
- Your re-created photo
- Photo of the original art
- Title, artist and year the original art was made

@GettyMuseum “THE SCREAM” made of bread, jam, cookie. https://t.co/z3mKdaM6pR #EdvardMunch pic.twitter.com/a7cbMUYiZw
— Rudi Anggono (@rudi_anggono) March 29, 2020